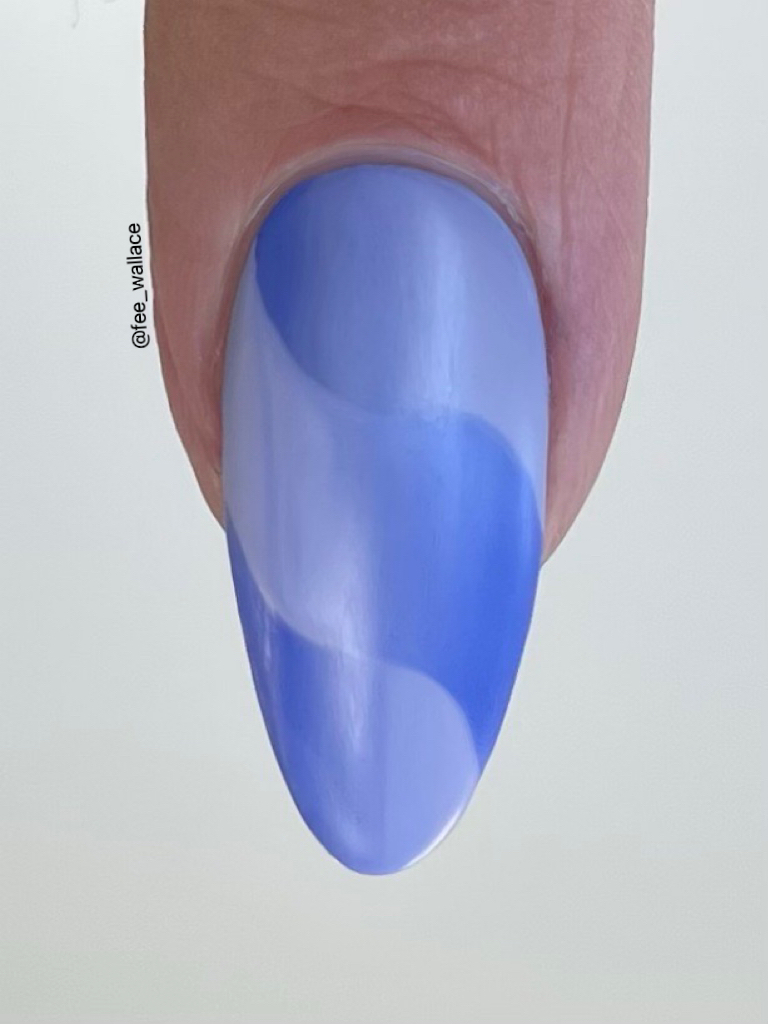
Our latest episode of Tune in Tuesday on Academy2 gave us the chance to dive into a big current trend. Nail Professionals all over the place are going wild for the optical illusion ombré fade, often done as French, but also in lots of other ways.
One of my favourite things to do is to take a popular nail trend, and reverse engineer a simple way of doing it using the products and tools I have in my collection already. For this ombré French trend, I’ve had great fun creating looks with:

“At its heart, this trend is created by layering two ombré fades, then carving out sections so we see through to the opposite ombré underneath–that’s what generates the optical illusion.” - Fee Wallace
How do we recreate this trend?
There are two main ways to create this look; use a highly pigmented coloured gel (such as a Light Elegance ButterCream), and blend two different colours together on the nail in multiple layers OR use pigment powder over a cured gel polish (such as CND™ Shellac™), blending the colours together on the surface with a soft dry brush (the Lecenté P1 Brush is perfect for this).

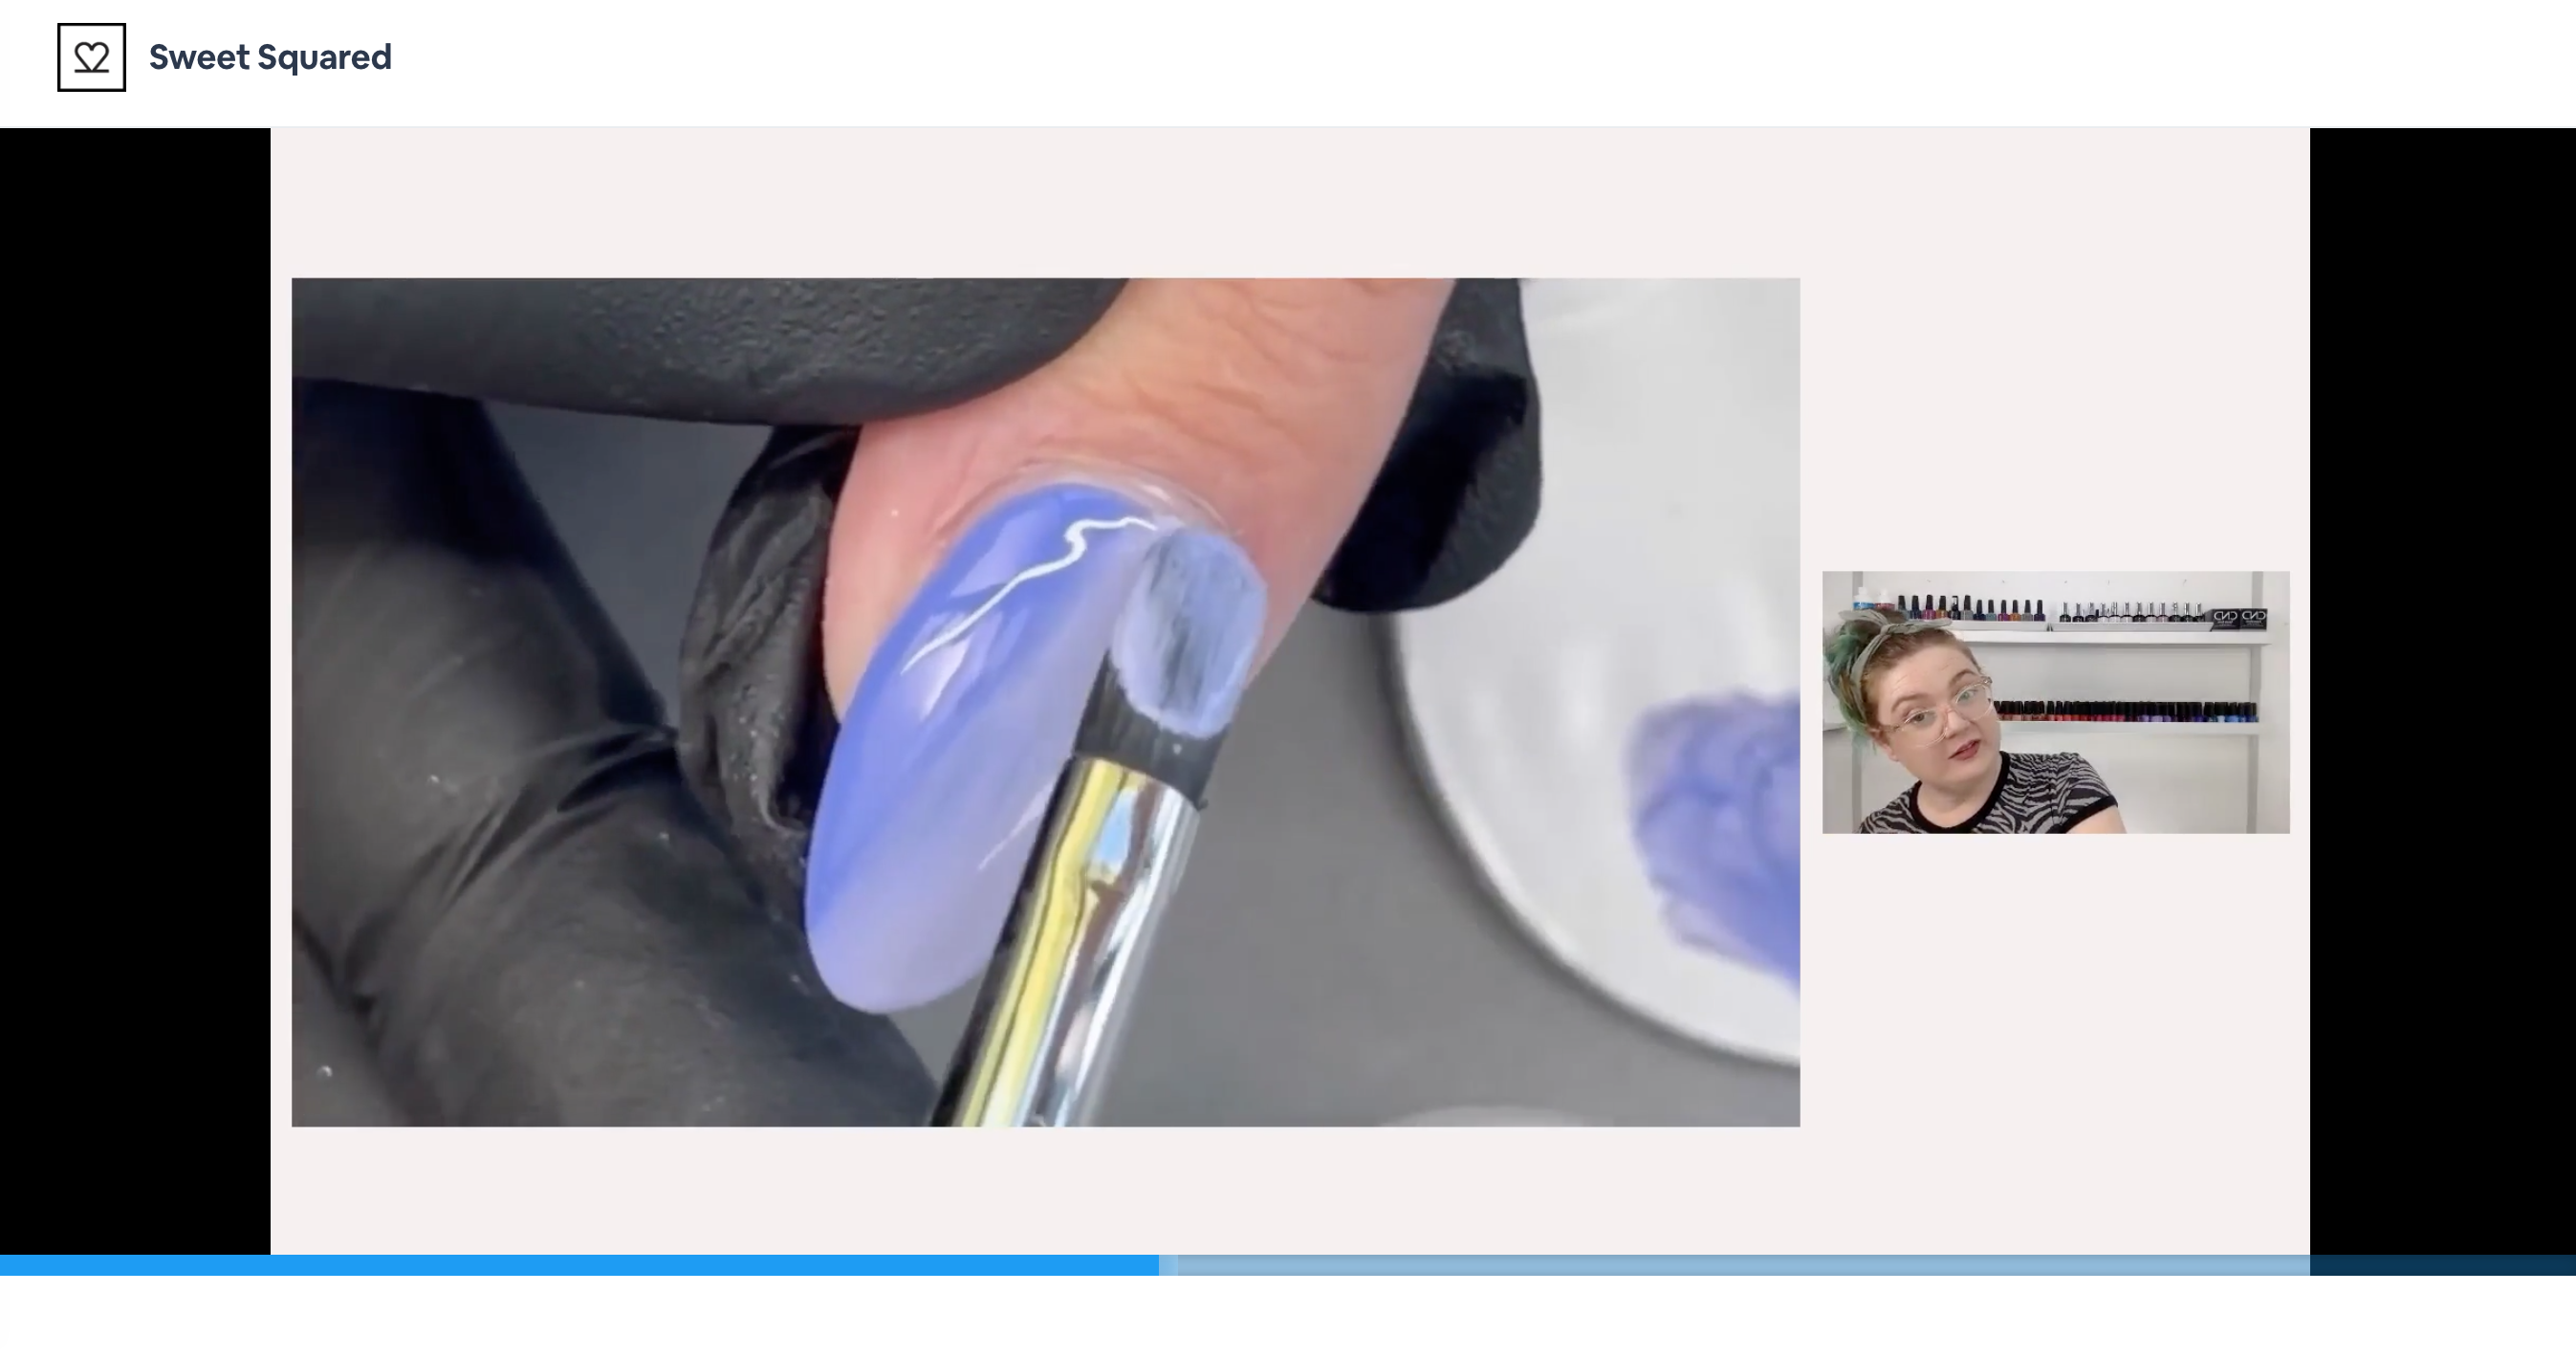
The other cool technique we covered in the show was how to create detailed design elements over CND™ Shellac™ with fine line marker pens. As you can see from the image above, this technique looks amazing paired with the optical illusion ombré fade, but it also works great simply over a single colour.
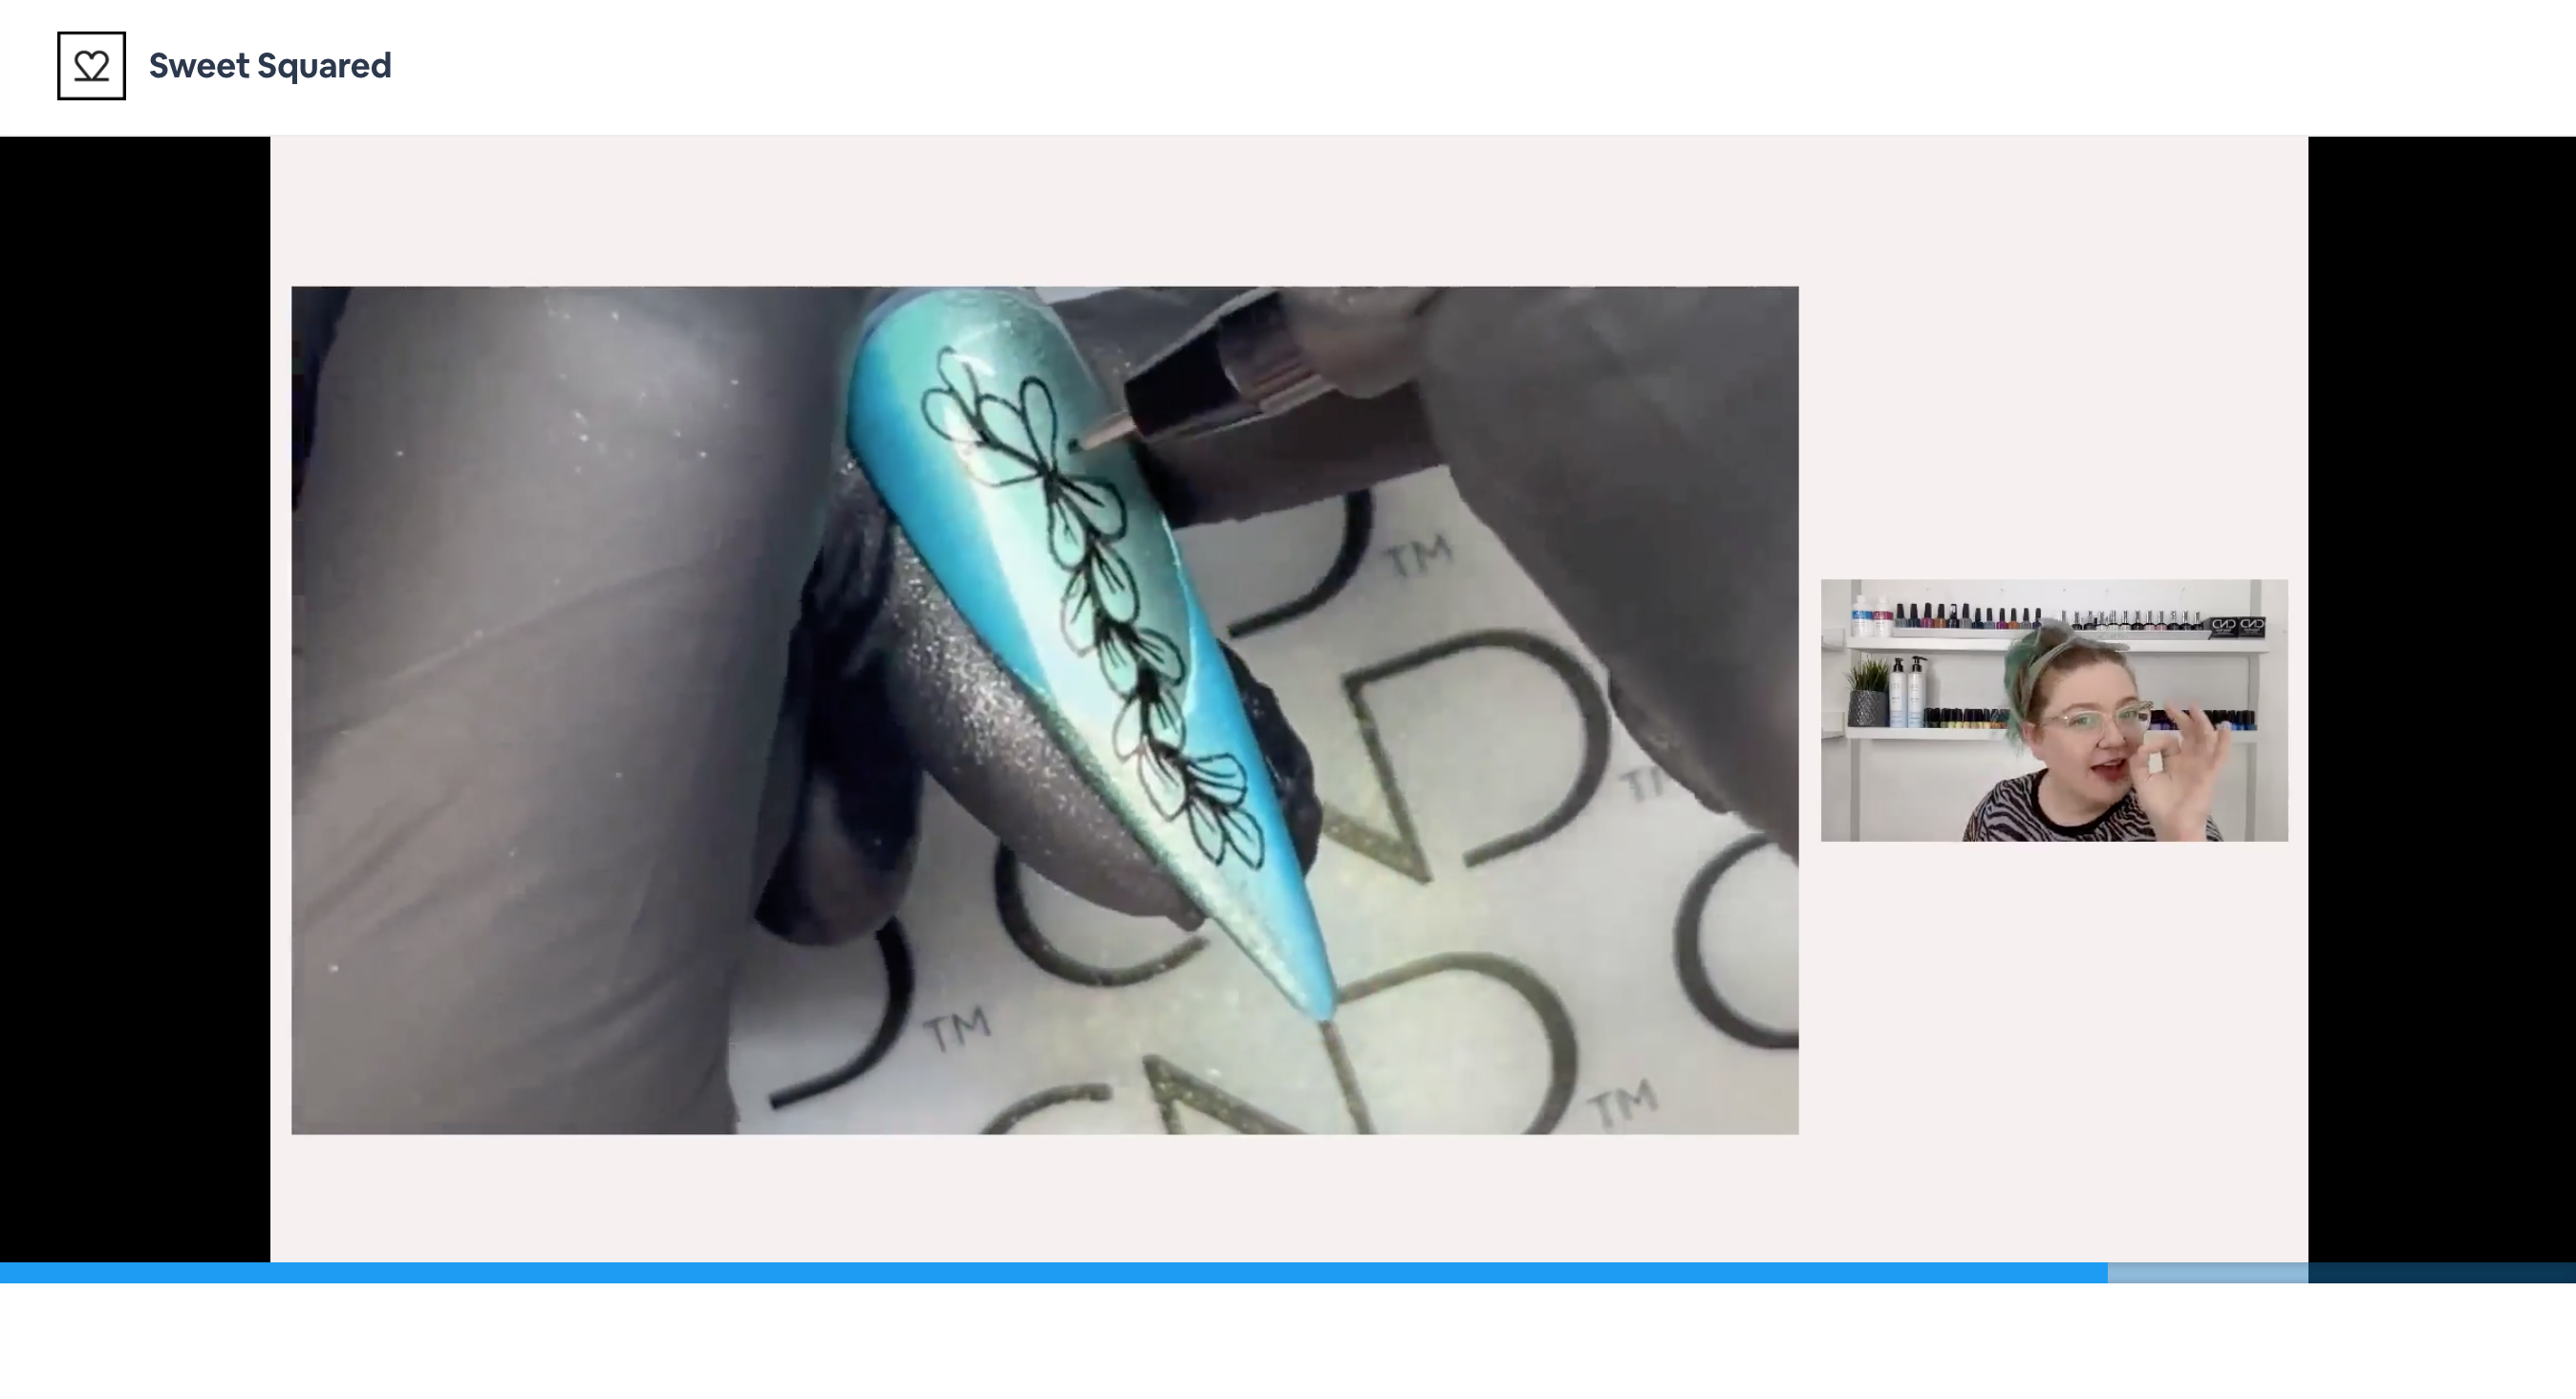
When using a fine line marker pen to create nail art details, there are only two surfaces I would draw on to; CND™ Shellac™ Matte Top Coat (cured, with sticky top film removed), or a cured layer of CND™ NO WIPE+ Top Coat. Once your drawing is complete, finish the nail with a further layer of top coat. I like to use CND™ Shellac™ XPRESS5 Top Coat at this point, as it has the thinnest viscosity.
The Looks and Step-by-Step Guides
We created several looks using the different techniques step by step, here are some of my favourites.
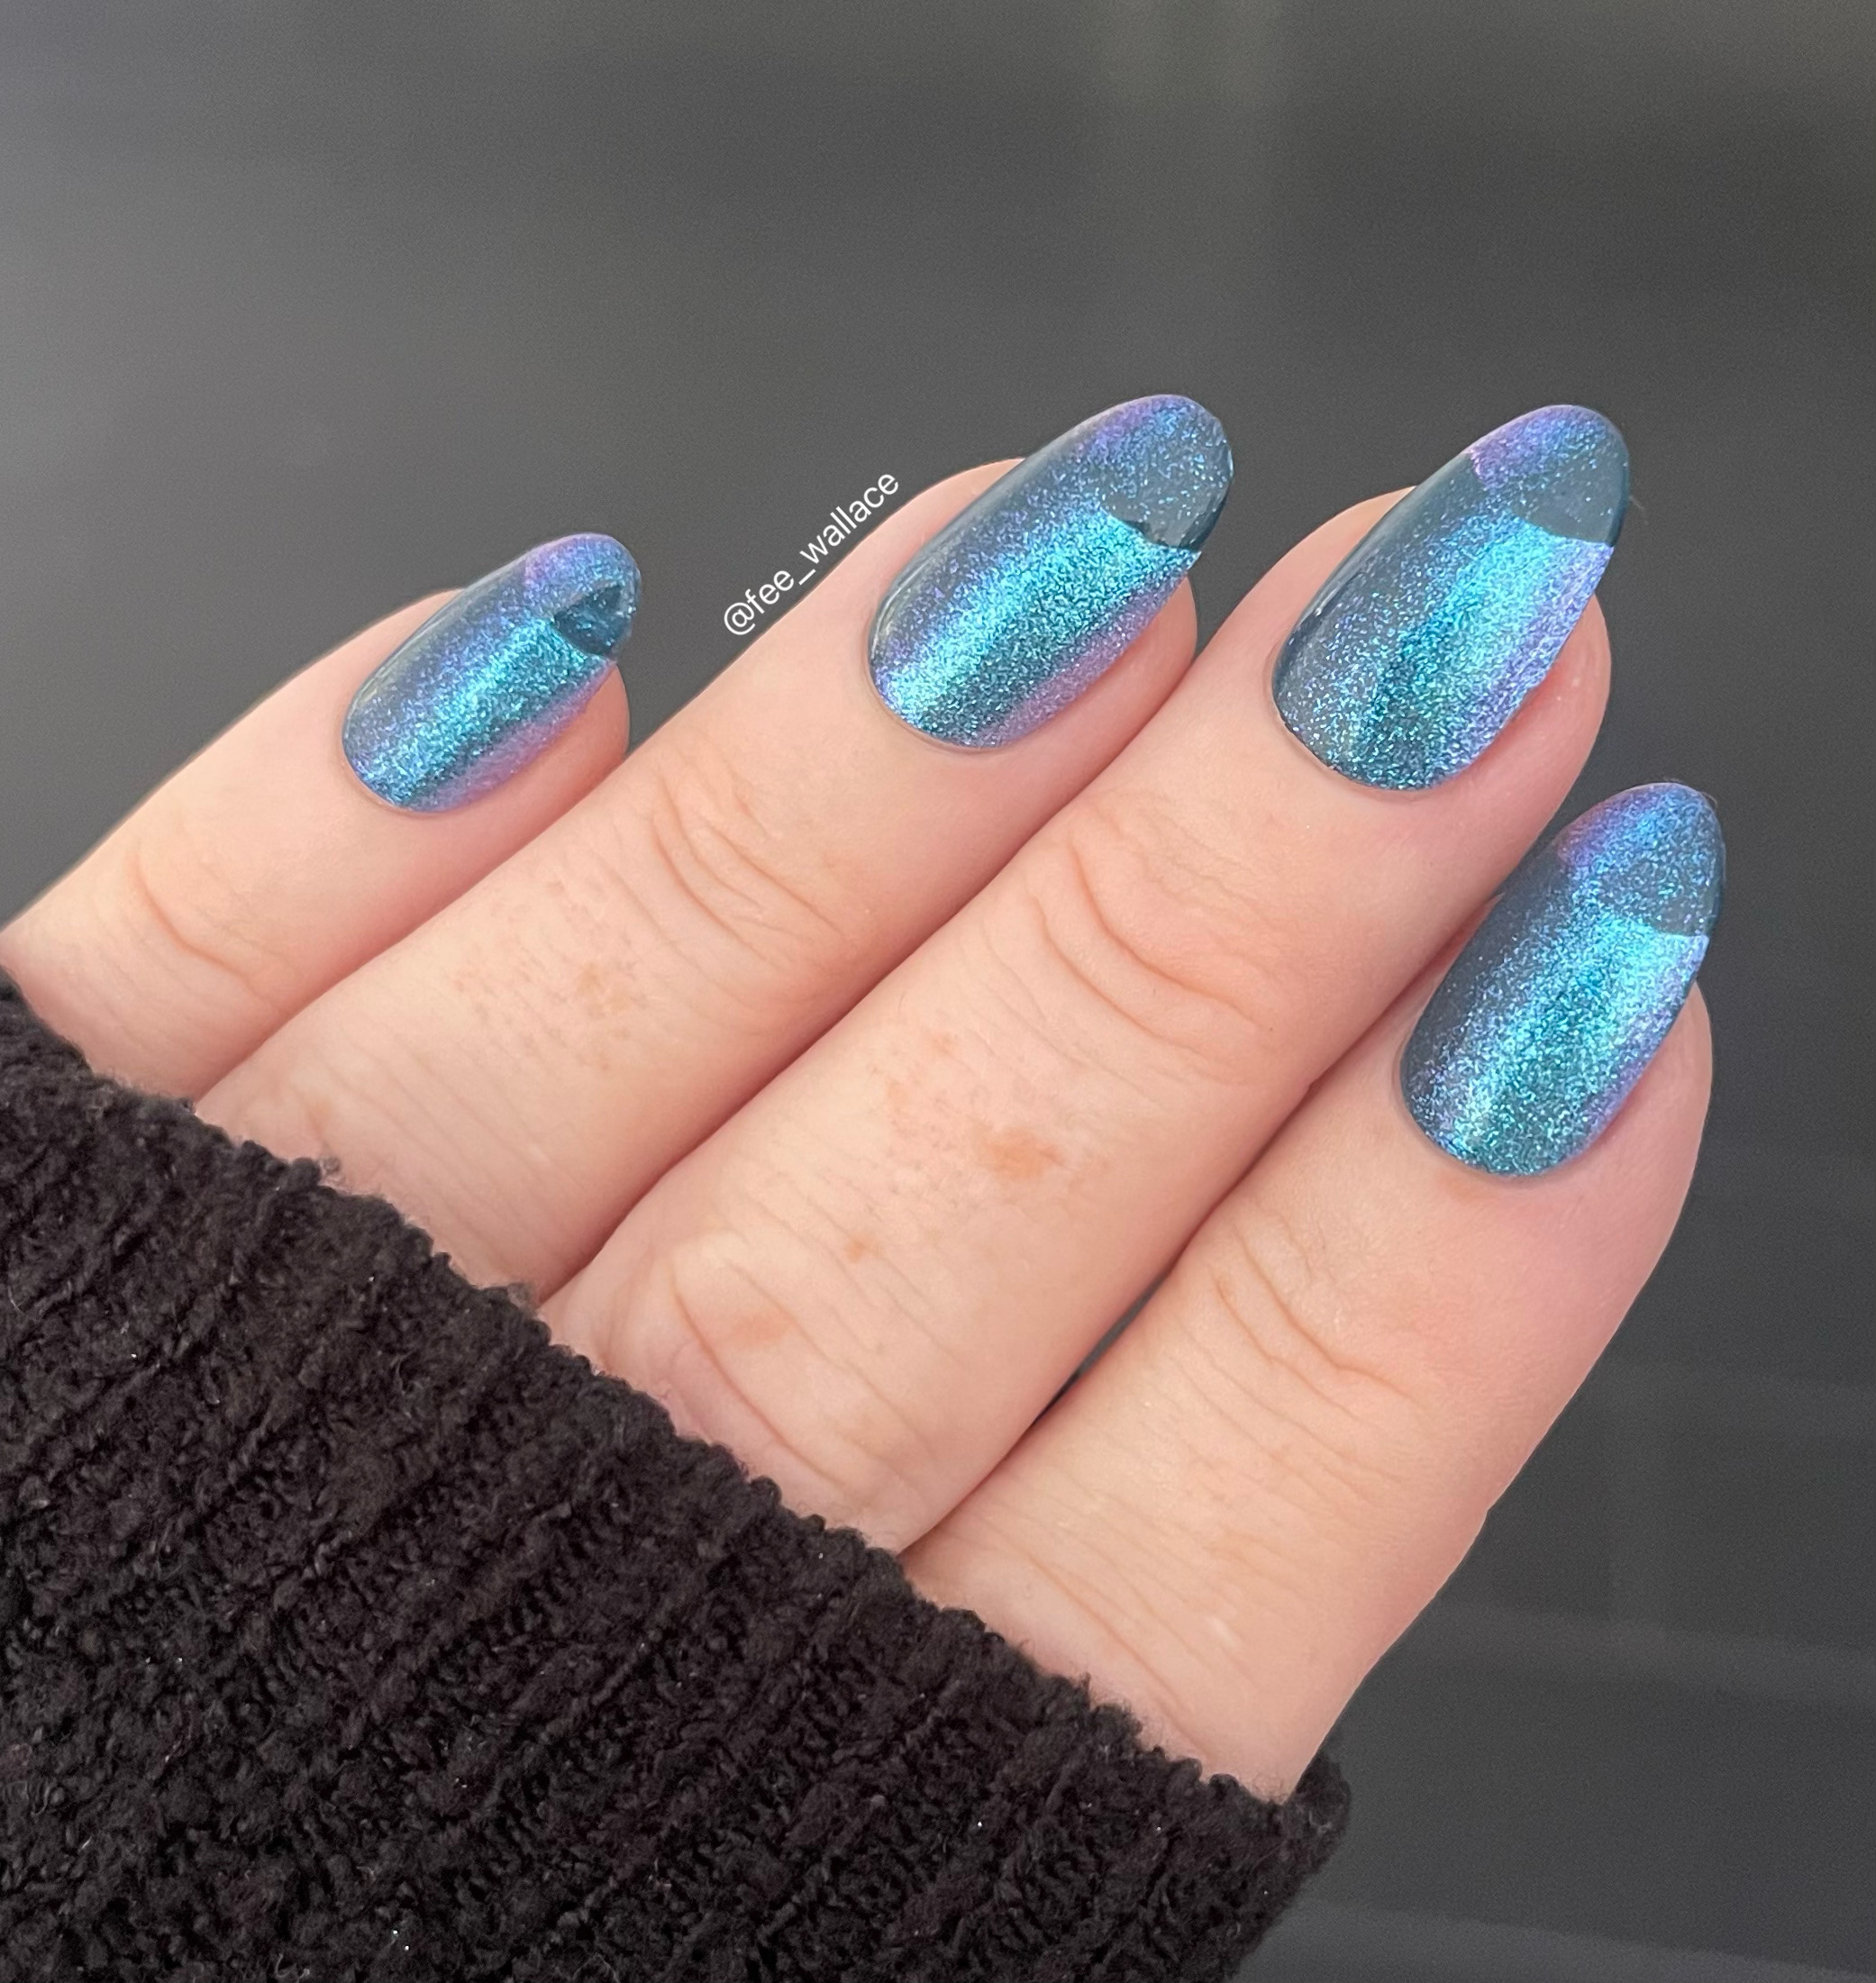
Step 1 – Begin with two cured Layers of Shellac™ Teal Time.
Step 2 – With a soft dry brush, apply CND™ Over The Top Effect: Pearl Obsession down one side of the nail, and fade the powder across with gentle flicking motions of the brush.
Step 3 – Seal with a thin layer of Shellac™ XPRESS5 Top Coat, then cure and remove sticky top film.
Step 4 – Apply Shellac™ Teal Time at the tip in a curved section, and cure.
Step 5 – Again, apply Pearl Obsession, this time to the opposite side, and fade across as before.
Step 6 – Seal the entire nail with CND™ Shellac™ NO WIPE+ Top Coat, and cure.
Finish here, or go on to add more detail with a fine line marker to all or just a few of the nails.
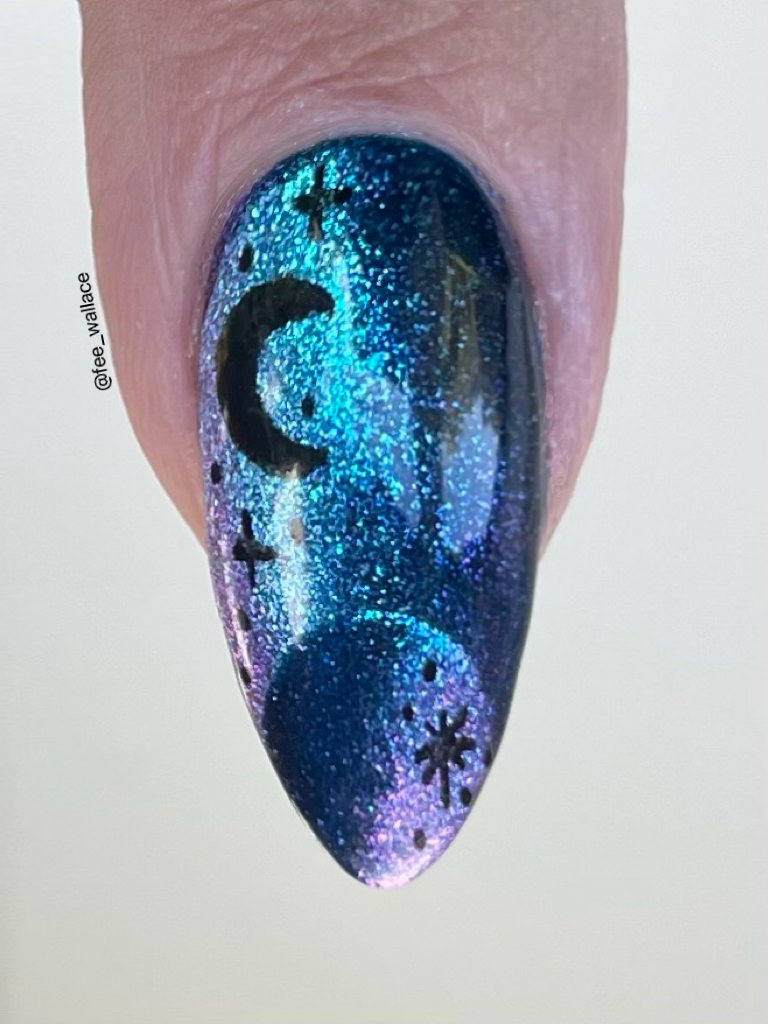
Step 7 – With a black fine line marker pen, add a crescent moon and star details to the cured Shellac™ NO WIPE Top Coat layer.
Step 8 – Finish the nail with Shellac™ XPRESS5 Top Coat and cure. Remove top film and complete the service by applying SolarOil.
Step 1 – Using a gel brush, apply a light colour to one vertical half of the nail of the nail, and then a darker colour to the other.
Step 2 – With long smooth strokes, use your gel brush to blend the two sections together. Once you are happy with your blend, cure this layer.
Step 3 – Now apply the same two colours, but this time on opposite sides. Blend the colours together in the same way as before. Don’t cure yet though.
Step 4 – Clean off the gel brush and use it to carve through the uncured layer of blended gel to reveal the layer underneath. Take your time, clean off the brush regularly, and be sure to show both the light and dark side of the nail in every carved-out section for best results. Once you are happy with your carved-out sections, cure this layer.
Step 5 – Finish with the Top Coat of your choice.
Blending with Light Elegance ButterCreams - Important Things to Know!
I have found Light Elegance ButterCreams to be one of the best mediums to use when blending coloured gels together on the nail to create an ombré fade. When choosing what colours to use, bear in mind that two colours close to each other will be much easier to blend together. The neon shades in the picture below are a great example. Colours that are very different will require more skill and patience to blend beautifully, but the payoff is a more intense optical illusion.

In terms of finishes, I have found that a matte finish seems to create more of an illusion, but a glossy finish also looks great. When using LE ButterCreams, or any hard gel (not gel polish), LE Flat Matte TopCoat is my recommendation.
If applying LE ButterCreams to CND™ PLEXIGEL, as I often do, file finish and use ScrubFresh just as you would before applying any colour coating, then apply a layer of LE Tack and cure. LE Tack is a thin curable bonding agent that will allow LE ButterCreams to adhere beautifully to any nail enhancement surface.
NOTE: Light Elegance have confirmed that we can safely cure LE products in the CND™ LED Lamp with confidence, assured by the manufacturer that the cure is adequate. My own advice is that curing the occasional layer of LE Tack and a few LE ButterCreams here and there in the CND™ Lamp is fine, but if you take on more of the Light Elegance hard gel system, I recommend using the LE Dot LED Lamp for a more reliable, consistent and comfortable cure. Also please remember, CND™ do not recommend attempting to cure any of their products in any other brand of lamp but their own.
Thanks so much for checking out the blog! You can find me, Fee Wallace on:
Facebook - https://www.facebook.com/fee.wallace
Instagram - https://www.instagram.com/fee_wallace/
TikTok - https://www.tiktok.com/@fee_wallace
I’d be thrilled to see your pictures if you try some of the optical illusion ombré combos suggested here, please tag me, I’d love to share your work on my stories!