LIGHT ELEGANCE WINTER NAIL ART STEP-BY-STEPS WITH DARCY
22nd Dec 2021
Join Darcy as you takes you through some quick and easy nail art tutorials. Perfect for when times are short and your client wants something a little extra.
HOLIDAY 3D FLOWER DESIGN
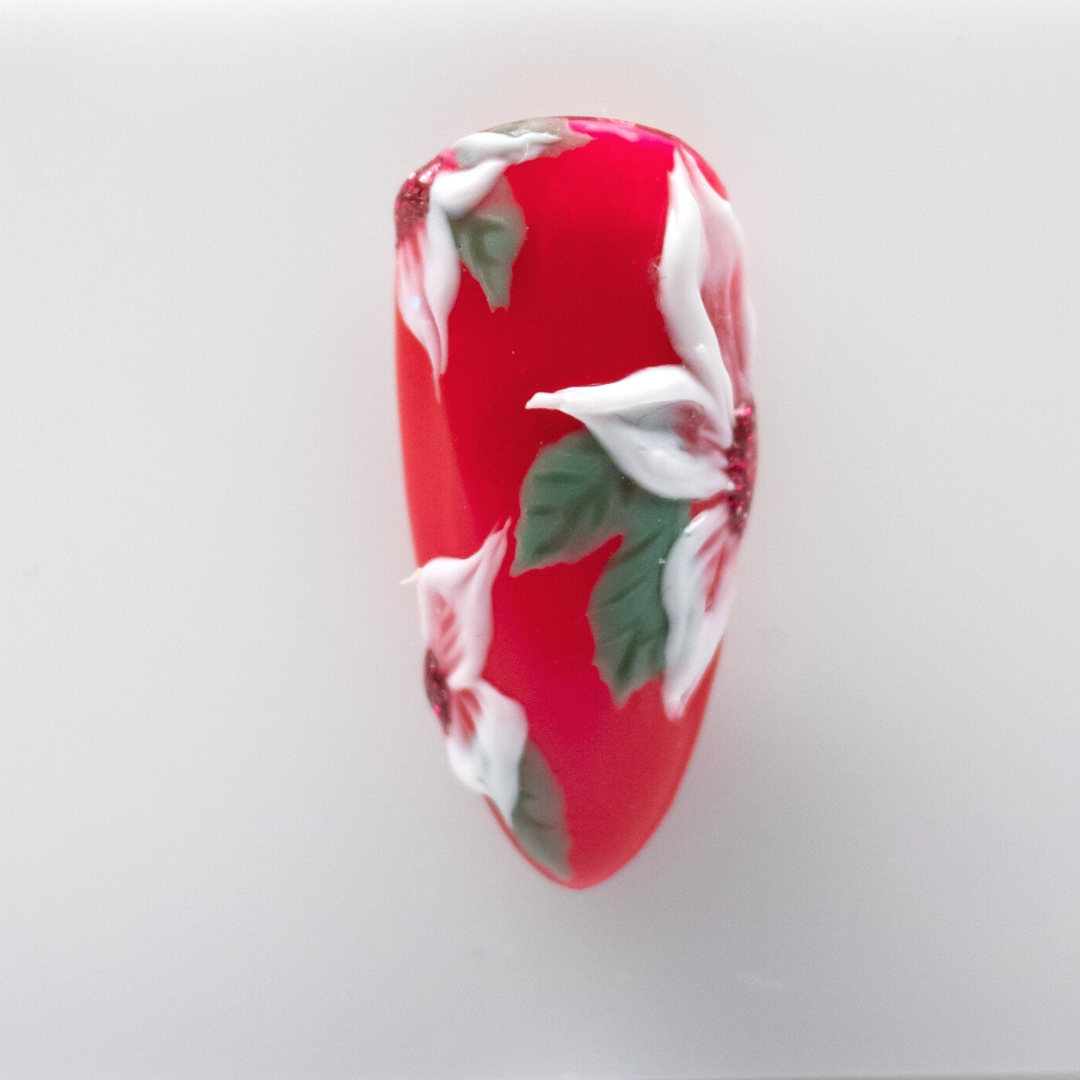
Looking for a festive 3D design for the holidays? Here is a quick design to create for your clients to enjoy!
Products used:
- Tack (To bond gel to tip. Not necessary if applying over Lexy Line or JimmyGel products)
- Heartbreak Color Gel
- Super Shiny
- Chemical Imbalance and Jane of the Jungle ButterCreams
- Competition White Gel (other options: Ideal White Builder, French Tip or Just White ButterCream)
- Long Distance Love Glitter Gel
- Celina Ryden Block, Stripy and Swirly Brushes
Step 1:
Apply 2 coats of Heartbreak to nails that have already had a Lexy Line or JimmyGel application completed. Cure each colour coat for 30 seconds.
Step 2:
Apply Super Shiny to nails, cure 1 minute. Cleanse inhibition layer.
Step 3:
Using Block Brush and Chemical Imbalance ButterCream, paint leaves in the desired placement. To create the pointed tips on the leaves, use the Swirly Brush to pull the Chemical Imbalance out to a point. Cure 1 minute.
Step 4:
Using Stripy Brush and Jane of the Jungle ButterCream, paint the veins on the leaves and cure 1 minute.
Step 5:
To create the flower petals, use the Block Brush, pick up a small dollop of Competition White Gel to create the centre petal of the largest flower. While applying the gel, press down at the outside of the petal and as you pull the brush toward the centre of the flower, twist the brush to taper the centre of the petal.
Using the Swirly Brush, pull the petals out to create a longer tip on the outside of the petal.
Each petal can be flash cured, or you can continue to produce all of the petals.
Cure for 1 minute.
Step 6:
To create the flower centre, use the Swirly Brush to pick up a small amount of Long Distance Love Glitter Gel and place it in the centre of each flower. Cure for 30 seconds.
Step 7:
The 3D art does not need a Top Coat, but the Glitter Gel should have Super Shiny applied. Using the Swirly Brush, pick up a small dollop of Super Shiny and apply it to each glitter centre. Cure for 1 minute.
Cleanse the inhibition layer using LEpro Cleanser and a LEpro Wipe, apply cuticle oil and Enjoy!
Pro tip: If there are any sharp spikes in the 3D design, use a Light Elegance Foamie File, to gently “buff” the sharp point away.
WINTER DESIGN
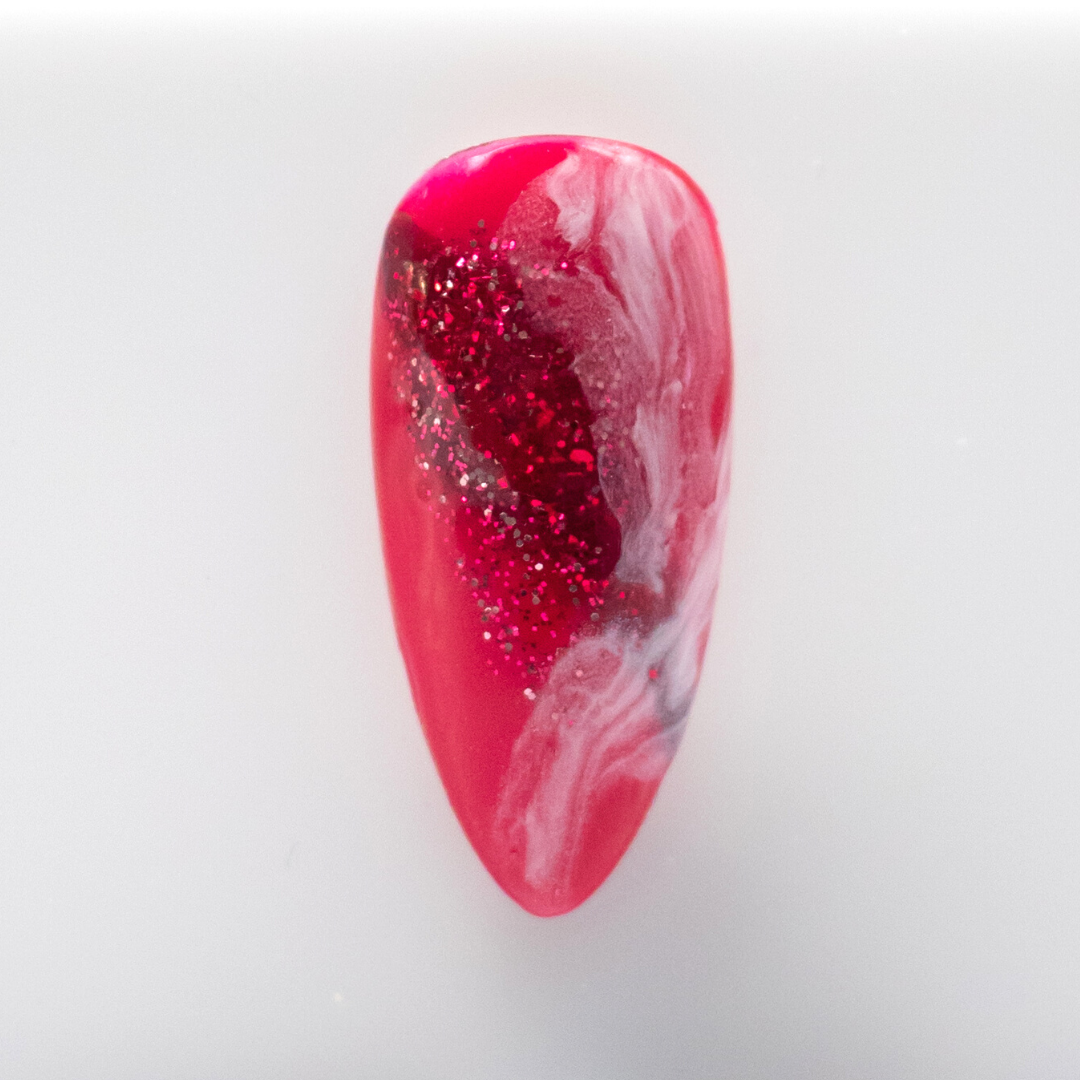
This is a fun and simple design that can be easily created in the salon, using a variety of different coloUr combinations.
Products used:
- P+ QDbase Gel and P+ Top Coat
- P+ Lipstick & Letters Gel Polish & P+ Missing You Madly Gel Polish
- P+ White Swimsuit Gel Polish
- P+ Long Distance Love Glitter Gel Polish
- P+ Mariachi in Mexico Glitter Gel Polish
- LE Celina Ryden Stripy Brush
Step 1:
Apply QDbase to nails, cure 1 minute.
Using P+ Lipstick & Letters, apply a thin layer to all nails, cure 30 seconds in LEDdot lamp.
Step 2:
Apply a thin second coat of P+ Lipstick & Letters to 5 nails, Do Not Cure Yet.
On two accent nails, apply a streak of P+ Missing you Madly, across the uncured Lipstick & Letters, be sure to wipe the brush off on a lint-free wipe prior to putting it back into the bottle.
Once desired swipe of Missing you Madly is achieved, cure 30 seconds.
Step 3:
Wiping much of the glitter off the P+ brush, apply a small amount of P+ Long Distance Love glitter gel polish over an area of the nail where the swipe of Missing you Madly was added and allowing some to sprinkle over Lipstick & Letters too.
Apply to the thumb nail as a glitter fade. Cure for 30 seconds.
Step 4:
Using P+ Mariachi in Mexico glitter gel polish, apply a small amount of the glitter gel, keeping it concentrated over the swipe of Missing you Madly.
Add a little Mariachi in Mexico over the glitter fade on the thumb nail. Cure 30 seconds.
Step 5:
Apply P+ Top Coat to the two accent nails, Do Not Cure Yet.
Using P+ White Swimsuit, remove most of the gel polish from the bristles and lightly swipe into select areas of the uncured P+ Top Coat and allow White Swimsuit to “bloom” in the uncured top coat.
(Additional accent lines can be added using the Stripy Brush and P+ White Swimsuit.)
Once happy with the effect on the accent nails, cure 1 minute.
Step 6:
Once happy with the design, apply P+ Top Coat to all nails and cure 1 minute.
Cleanse inhibition layer using LEpro Cleanser and an LEpro Lint Free Wipe, apply cuticle oil, and Enjoy!